
In this blog post, you’ll learn all about Azure Proximity Groups, why they are necessary and how to use them.
What are Azure Proximity Placement Groups?
Microsoft defines Azure Proximity Placement groups as an Azure Virtual Machine logical grouping capability that you can use to decrease the inter-VM network latency associated with your applications (Microsoft announcement blog post). But what does that actually mean?
When you look at VM placement in Azure and the reduction of latency between VMs, you can place VMs in the same region and the same Availability Zone. With that, they are in the same group of physical datacenters. To be honest, with the growing Azure footprint, these datacenters can still be a few kilometers away from each other.
That may impact the latency of your application and especially application with a need for latency within the nanosecond ranges will be highly impacted. Such applications can be for example banking applications for low latency trading or financial stock operations.
Utilizing Azure Proximity Placement Groups for Optimal Performance
With Azure Proximity Placement Groups, you gain finer control over the placement of your virtual machines, ensuring that they are located in close physical proximity within the Azure infrastructure. By grouping VMs together based on their latency requirements, you can minimize network latency and improve the overall performance of latency-sensitive applications. This level of optimization is crucial for applications with strict latency requirements, such as high-frequency trading systems or real-time analytics platforms.
Proximity Placement Groups bring together as near as possible to achieve the lowest latency possible. Following scenarios are eligible for Proximity Placement Groups:
- Low latency between stand-alone VMs.
- Low Latency between VMs in a single availability set or a virtual machine scale set.
- Low latency between stand-alone VMs, VMs in multiple Availability Sets, or multiple scale sets. You can have multiple compute resources in a single placement group to bring together a multi-tiered application.
- Low latency between multiple application tiers using different hardware types. For example, running the backend using M-series in an availability set and the front end on a D-series instance, in a scale set, in a single proximity placement group.
All VMs must be in a single VNet like shown in the drawing below:
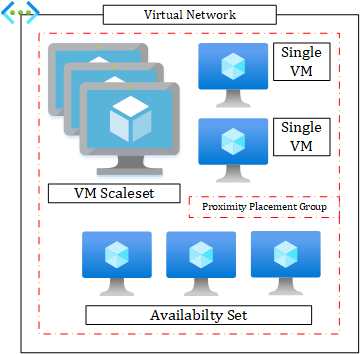
I wouldn`t suggest single VMs for production workloads on Azure. Always use a cluster within an Availability Set or a VM Scale Set.
How does that look like in an Azure Datacenter environment?
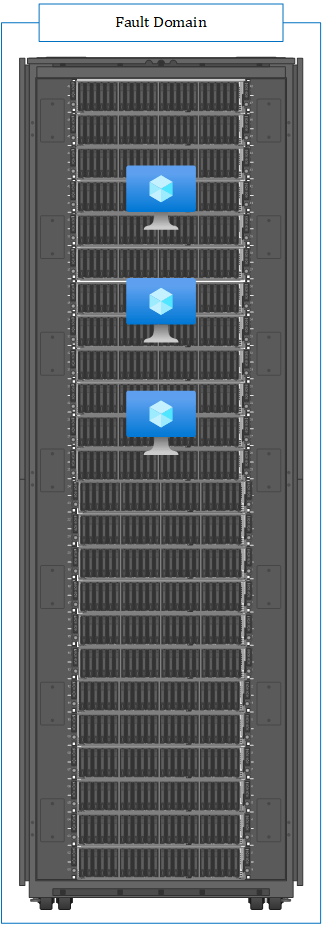
The following drawing shows the placement of a VM without Proximity Groups:

With Proximity Groups for a single VM, it could look like the following:
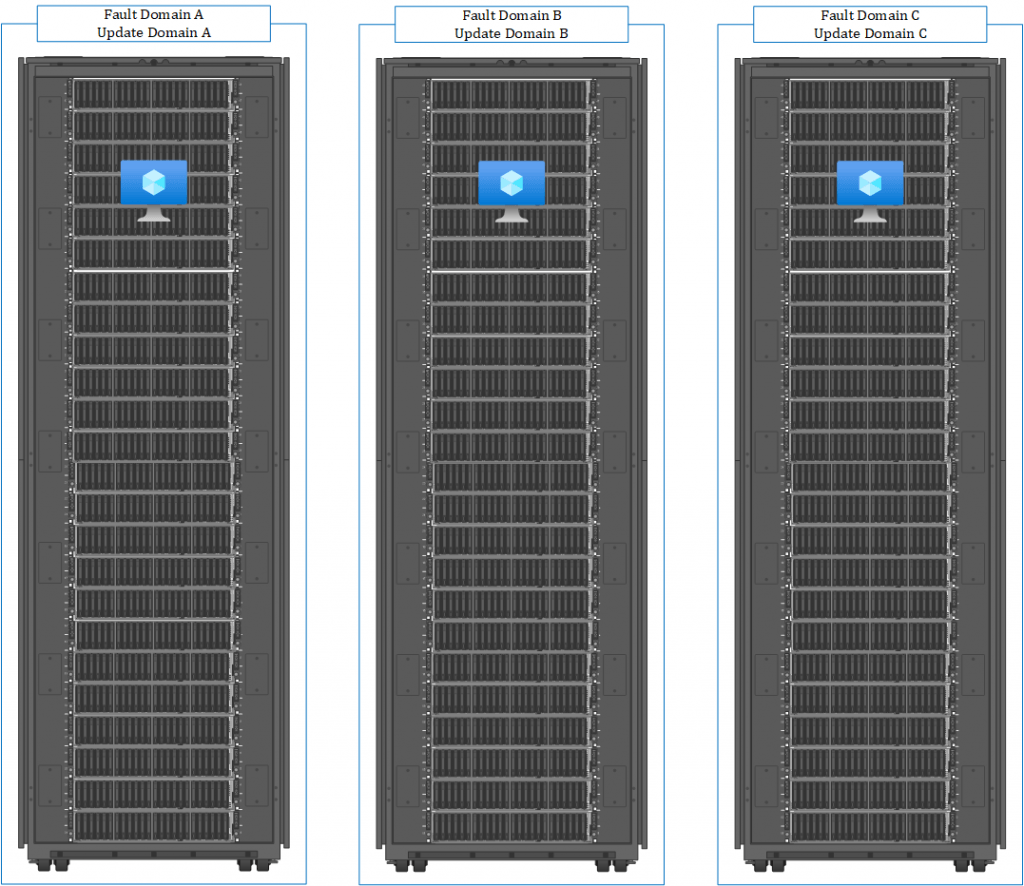
When you use availability sets for your VMs, the distribution can look like the following.
With that said, let’s learn how to set up a Proximity Placement Group.
How to set up a Proximity Placement Group
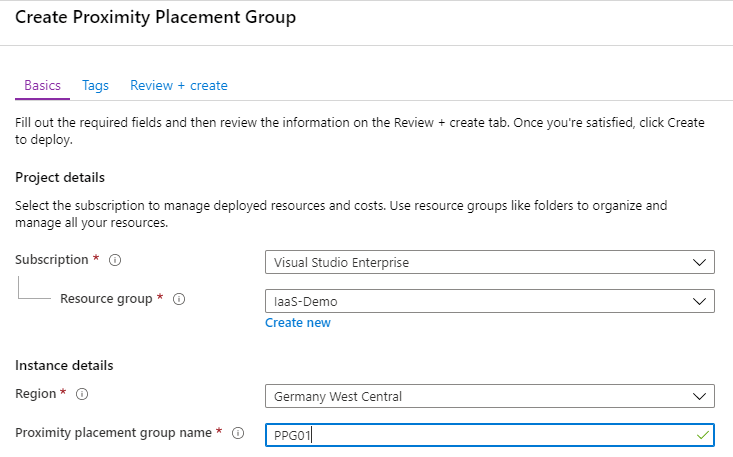
To set up a Proximity Placement Group is pretty easy.
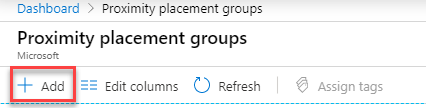
Look for Proximity Placement Groups in the Portal:
Add a new group:
Select Subscription, Resource Group, Region and the name and create the group:
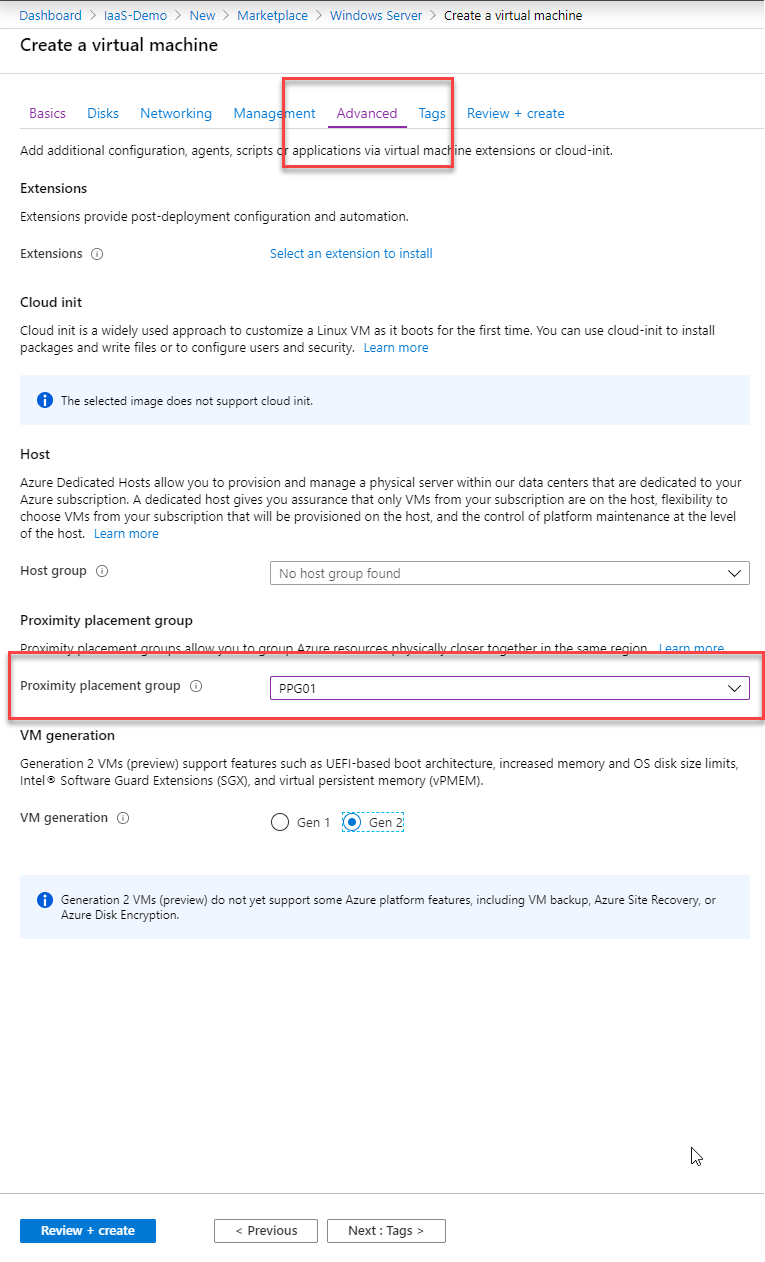
When you now create a VM you can select the Proximity Placement Group in the advanced tap:
There is also the option to use PowerShell to deploy Proximity Groups.
Conclusion
The information in this blog post explains Proximity Groups and the ways to use them but if you’re stuck or if there’s something you need further explanation about, let me know in the comments below and I’ll get back to you!
More in this category


About the Author

Flo Fox

