Without a doubt Hyper-V snapshots can be quite useful. They make software and systems testing a little less stressful because you know you can roll back any changes. They can provide a “quick and dirty“ backup solution. Or you can use them as starting points for new virtual machines.
You could take a snapshot and use it as the basis for a new VM on another Hyper-V server. Perhaps you want to roll a snapshot from a production virtual machine to a virtual machine on your test server. Or if resources are limited, perhaps even on the same server. That’s what I want to demonstrate: creating a new virtual machine based on a snapshot of an existing virtual machine.
Using the Hyper-V Manager
To begin, we’re going to need a snapshot. I’m going to “clone” my XP LAB virtual machine. In the Hyper-V Manager select Snapshot in the Actions pane as I’ve highlighted in Figure 1.
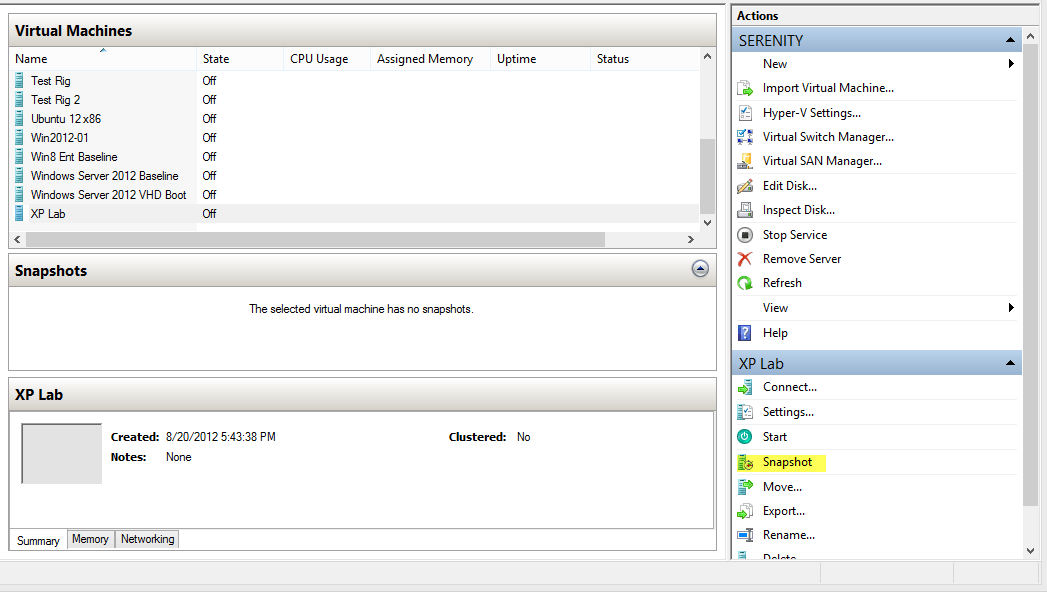
Figure 1 Taking a Snapshot with the Hyper-V Manager
Or right-click on the VM and choose Snapshot from the context menu. Once I have a snapshot, I’m going to export it. This will write all the necessary files to disk in a new location. I want this so that I can work with the exported files and not worry about disturbing the snapshot itself. I can either right click on the snapshot as you see in Figure 2 or select Export from the Actions pane.
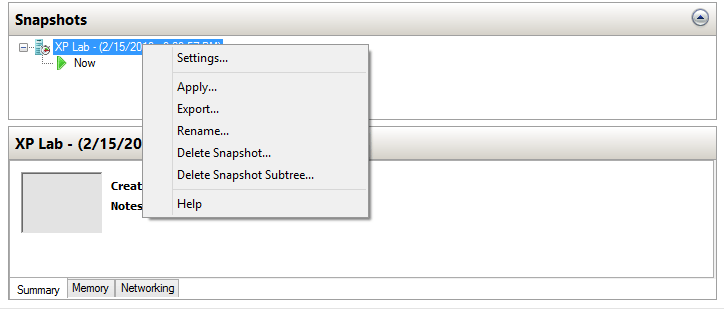
Figure 2 Export from the Context menu
Export the Virtual Machine
In the prompt I’ll specify the path for my exported files in Figure 3 and click Export.
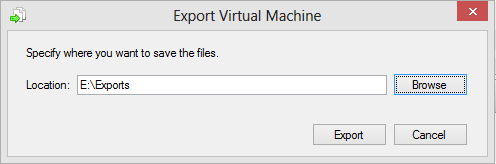
Figure 3 Export Path
The export will create a folder for the hard disks and virtual machine as you can see in Figure 4.
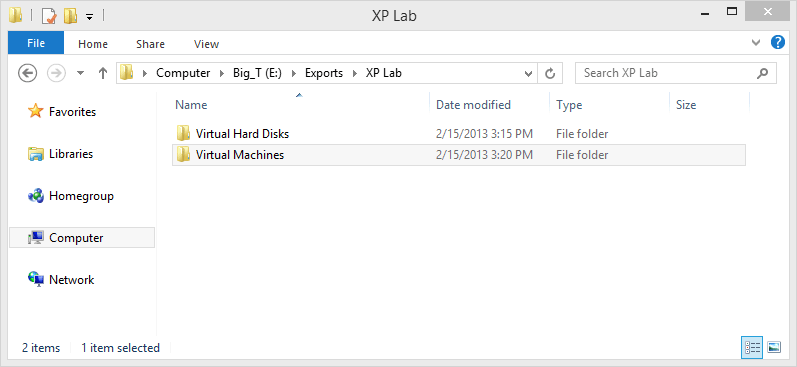
Figure 4 The exported files
The disk will be copies of any VHD or VDHX files. Under Virtual Machines you’ll find an XML configuration file. To create a new virtual machine I have a few options. I can create an entirely new virtual machine in Hyper-V Manager using the exported hard disk. Or I can re-import the virtual machine.
Note: There are ramifications regardless of how you use the exported snapshot. Because the hard disk is already configured with an operating system, at least in my example, when the virtual machine comes on line there may be naming, network or licensing conflicts. You’ll need to take this into account either through additional virtual machine modification or through changes to the underlying operating system.
Import the Virtual Machine
Creating a new virtual machine is pretty straight forward so I won’t cover that. My intention is to use the exported virtual machine as a new virtual machine. In Hyper-V Manager I’ll select Import Virtual Machine from the Actions pane and specify the top level path to the exported snapshot (Figure 5).

Figure 5 Import the virtual machine folder
Clicking Next displays the exported virtual machine snapshot (Figure 6).
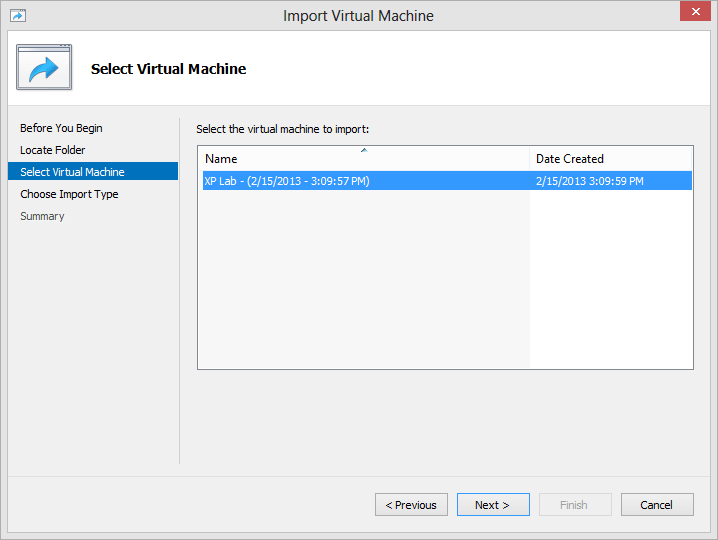
Figure 6 Select the virtual machine
On the next screen you have to be careful. Because my original virtual machine still exists and I’m importing this on the same system, I need Hyper-V to create new identifiers. So I choose the appropriate option in Figure 7.

Figure 7 Choose Import Type
Another alternative would have been to create new virtual machine using the exported files by using the Register option. This only works if you are importing on a different Hyper-V server or if the original virtual machine disk files are in a different location other than the default.
But I’m going to copy the VM anyway. Next, I can decide where to store the new virtual machine (Figure 8).
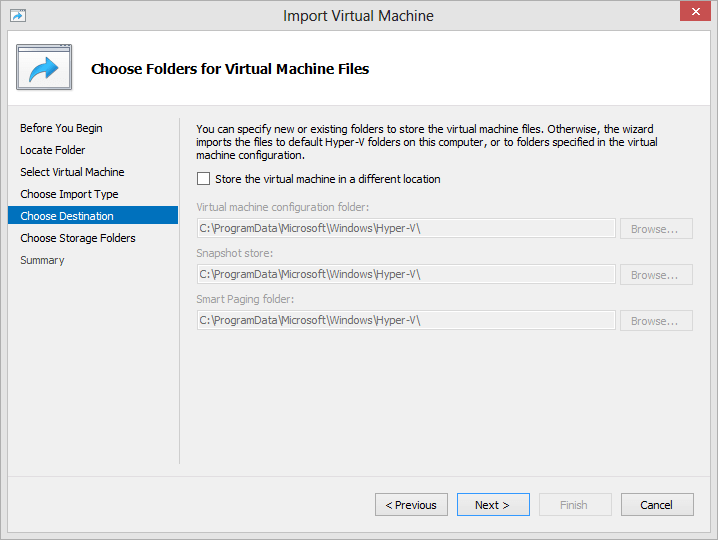
Figure 8 Choose folders for virtual machine
I’m going to use the default settings. Finally, Hyper-V wants to know where to store the import virtual disk. It will display the default location, as you see in Figure 9.
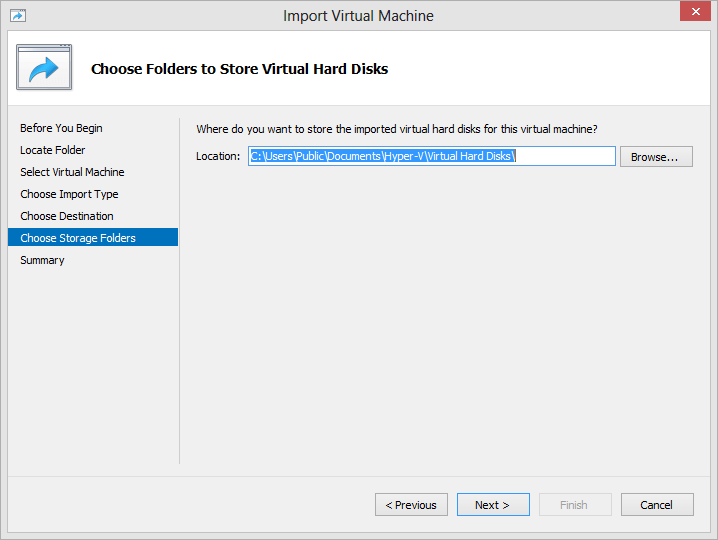
Figure 9 Folders to store virtual disks
I have to specify a different path if the disk files from the original machine virtual machine still exist in the default location. The import process will re-copy the VHD file (or files depending on the virtual machine) to this location. See Figure 10.
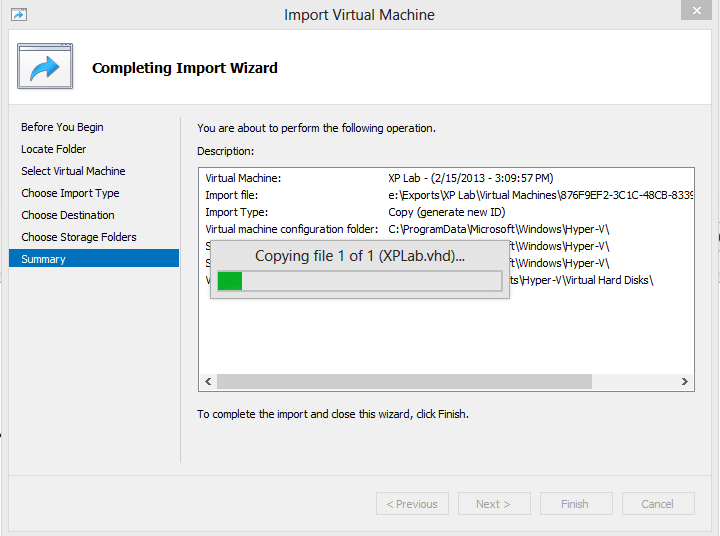
Figure 10 Complete the wizard
When the process is completed I have a new virtual machine as you see in Figure 11.
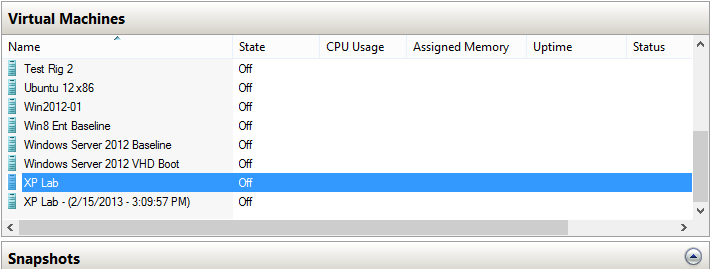
Figure 11 The new virtual machine
The name isn’t very friendly, but that is easily changed. Actually, if you edit the XML configuration file, you can modify the name prior to importing.
<global_id type="string">876F9EF2-3C1C-48CB-8339-BDE6D5097592</global_id>
    <highly_available type="bool">False</highly_available>
    <last_powered_off_time type="integer">130054318094417485</last_powered_off_time>
    <last_powered_on_time type="integer">130011093383728297</last_powered_on_time>
    <last_state_change_time type="integer">130054325974483199</last_state_change_time>
   <strong> <name type="string">XP Lab - (2/15/2013 - 3:09:57 PM)</name></strong>
    <notes type="string"></notes>
All I would need to do is modify the name which I’ve boldfaced. The import process will use this value. Ultimately, which ever technique you use will depend on your end goal.
Summary
The steps I’ve gone through should work if you are migrating the snapshot to a different Hyper-V Server or using the same as I’ve done here. As you can see, there is a lot of manual interaction here. I suppose if you only need to clone a single virtual machine from a snapshot is no big deal. But for real efficiency we will need to turn to Windows PowerShell, which we’ll cover in Part 2 of this series.
More in this category


About the Author

Jeffery Hicks

