Table of contents
Hyper-V Manager isn’t just for working with virtual machines. It also has the ability to perform a number of operations directly on virtual hard disks (VHDs). This includes the VHDX format introduced in 2012.
One of these features is the ability to transfer data from an existing physical or virtual hard disk into an a new file. You can use this task to save the contents of a drive from a failed system, to make a clean duplicate of a virtual disk as a new dynamically expanded disk with all the empty blocks removed, or any reason that you might come up with. When used with a source virtual disk, this is the graphical equivalent of the Convert-VHD PowerShell cmdlet, as it makes a new disk file out of an existing one, potentially with a completely different configuration.
Warning: You cannot use this to convert a guest installed in UEFI mode (Generation 2) to BIOS mode (Generation 1) or vice versa.
How to copy a disk’s contents to a new VHD in Hyper-V in 7 steps:
- In Hyper-V Manager, select the host that you want to create the new disk on in the left-most pane. In the Actions pane at the right, click New, then Hard Disk.
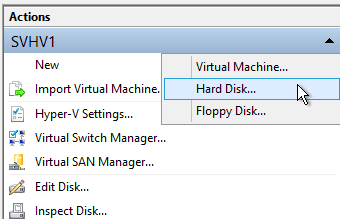
Start the New VHD Wizard
- This will open the New Virtual Hard Disk Wizard. The first screen is informational. Click Next when ready.
- The first meaningful screen of the wizard asks you which format version to use. In general, you’ll want to use VHDX. Use VHD if you’ll be using the disk file on a 2008 R2 or earlier host or if you’ll be uploading it to Azure.
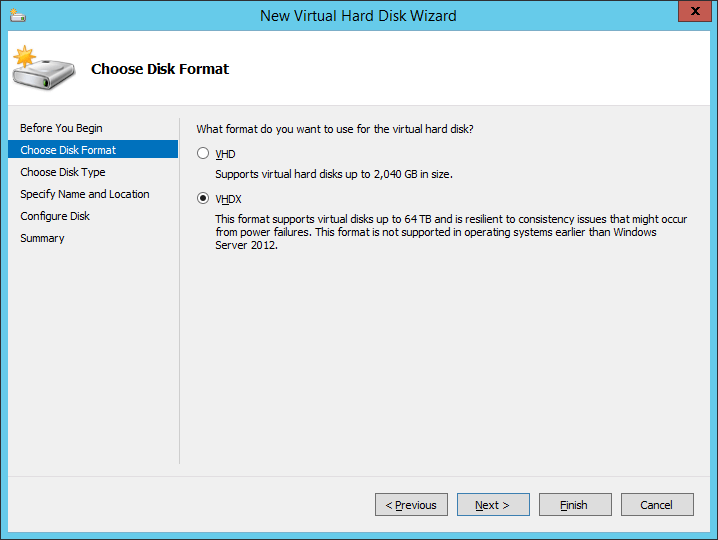
New VHD Wizard: Version Select
- On the next screen, you’ll be asked to choose the type of virtual disk to create. Because your intent is to make a new disk from an existing source, do not choose Differencing. If you choose Dynamically expanding, a new disk will be created that only uses the filled blocks from the source, so the new file will almost certainly be smaller than the original. Choosing Fixed size will result in a file that is exactly the same size as the maximum configuration of the source.
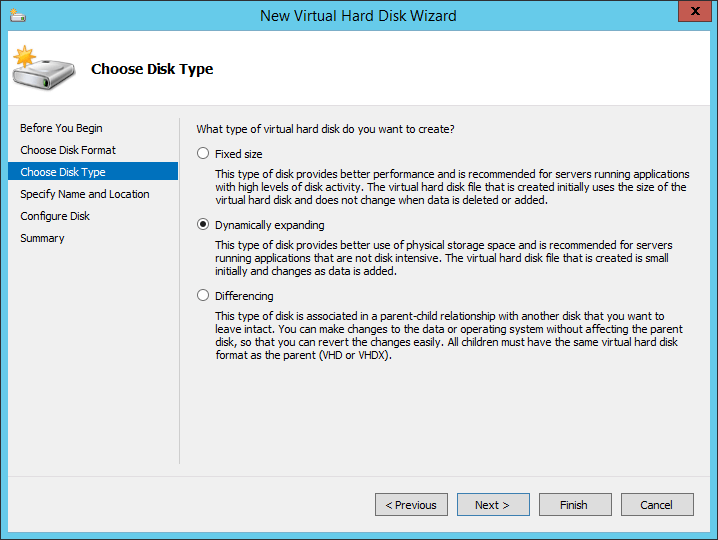
New VHD Wizard: Type Select
- Next, you’ll be asked where you want to place the new virtual hard disk. It doesn’t need to be in the same place as the original; it can be anywhere that the creating host’s computer account can access.

New VHD Wizard: Select Destination
- On this screen, you’ll be asked for the source. Since you’re making a copy, you’ll want the second or third option.
- The second option is to Copy the contents of the specified physical disk. Click that dot, then highlight the disk to copy from. The disk can be online when the copy is made.
- The third option is to Copy the contents of the specified virtual disk. A source virtual disk file cannot be in use when the copy is made. It does not need to match the new file in version or type.
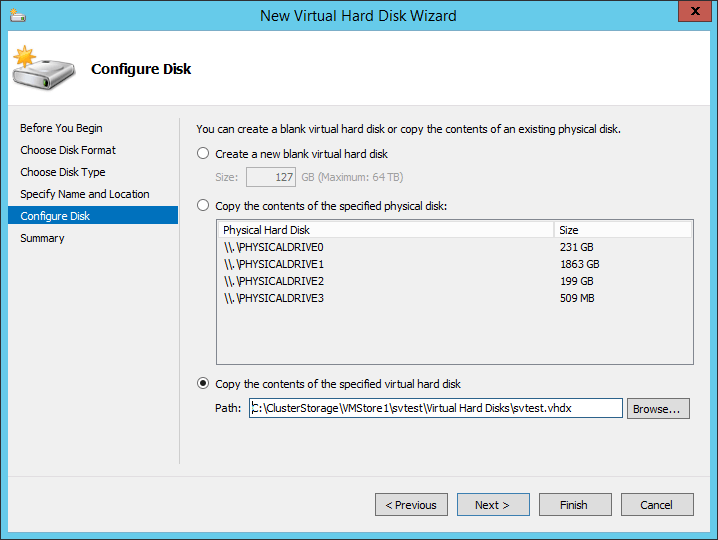
New VHD Wizard: Select Source
- The final screen is simply a confirmation dialog. Click Finish when ready. A progress bar will appear and remain until the copy is complete. If there are no errors, the dialogs will simply close.
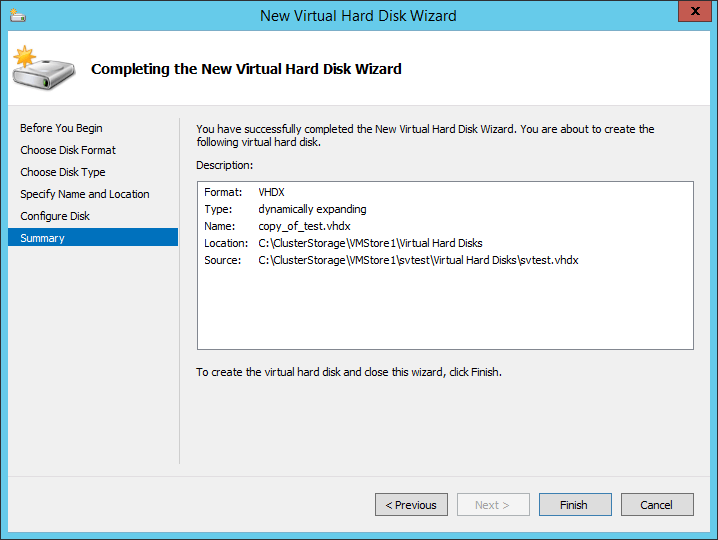
New VHD Wizard: Confirmation
Your new virtual disk file is filled with the contents of the source and is ready to use!
More in this category


About the Author

Eric Siron

