
Table of contents
- Prerequisites for a File Share Witness
- Using PowerShell to Configure a File Share Witness
- Using Failover Cluster Manager to Configure a File Share Witness
- Checking/Verifying Your Cluster Quorum Settings in Failover Cluster Manager
- Checking/Verifying Your Cluster Quorum Settings in PowerShell
- Troubleshooting a Cluster File Share Witness
- Why Use a File Share Witness for a Hyper-V Cluster?
- Reliability Requirements for a File Share Witness
- Need any help?
Traditionally, the preferred choice for a cluster quorum witness has been some type of networked disk. Small SAN LUNs do the trick nicely. Things have changed a bit, increasing the viability of the file share witness. You can configure one easily in a few simple steps.
Prerequisites for a File Share Witness
Just as with a cluster disk witness, you need to do a bit of work in advance.
- First, you need to pick a system that will host the share. It needs to be reliable, although not necessarily bulletproof. We’ll talk about that after the how-to.
- Space used on that share will be extremely tiny. Mine doesn’t even use 100 bytes.
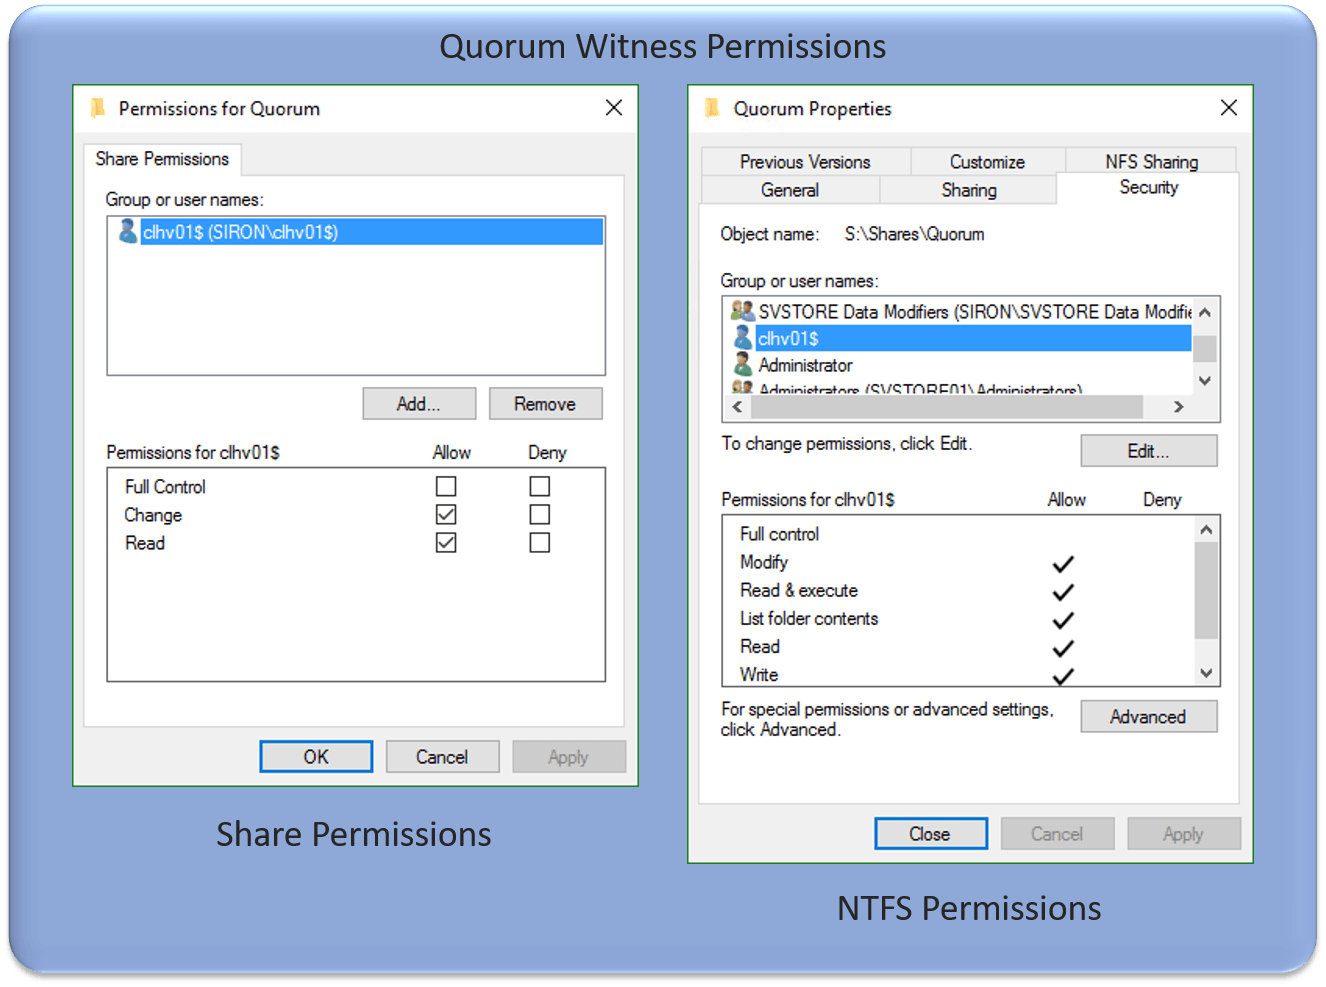
- You need to set adequate share and NTFS permissions. I just used my domain group that includes the cluster and nodes and gave it Full Control for both and that worked. From my observations, only the domain account that belongs to the cluster name object is used. It seems that Change on the share and Modify on NTFS are adequate permission levels.
- If you have firewalls configured, the cluster node needs to be able to reach the share’s host on port 445.
The cluster will create its own folder underneath the root of this share. When you configure the witness, it will generate a GUID to use as the folder name. Therefore, you can point multiple clusters at the same share.
Using PowerShell to Configure a File Share Witness
As with most things, PowerShell is the quickest and easiest way. You will use the Set-ClusterQuorum cmdlet.
From any node of the cluster, you can use that cmdlet with the FileShareWitness parameter:
Set-ClusterQuorum -FileShareWitness \svstore01Quorum
Once you have the name of the sharing host entered, you can use tab completion to step through the available shares.
If you want to run it remotely, make sure that you log in with an account that has administrative access to the cluster:
Set-ClusterQuorum -Cluster clhv01 -FileShareWitness \svstore01Quorum
Using Failover Cluster Manager to Configure a File Share Witness
Failover Cluster Manager has two different ways to get to the same screen.
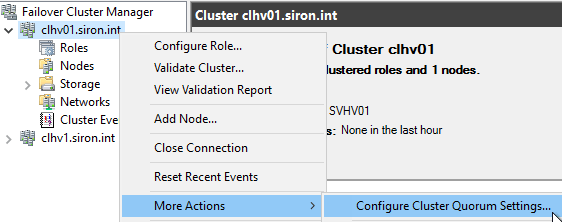
- In Failover Cluster Manager, right-click the cluster’s root node, go to More Actions, and click Configure Cluster Quorum Settings.
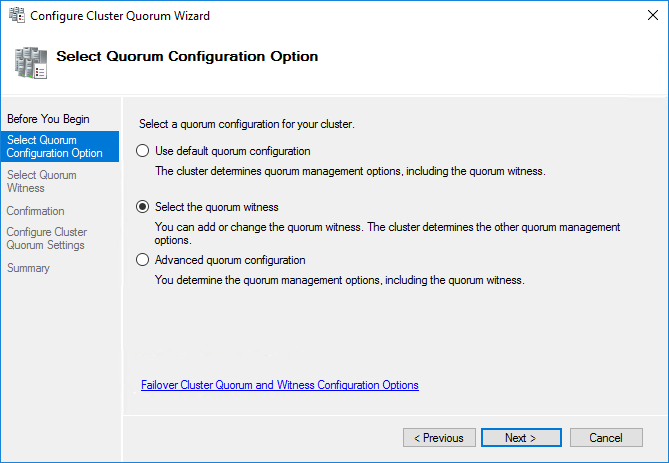
- Click Next on the introductory screen.
- If you choose Advanced quorum configuration, you can change which nodes have quorum votes. That is not part of this article, but you’ll eventually get to the same screen that I’m taking you to. For my directions, choose Select the quorum witness. Click Next.
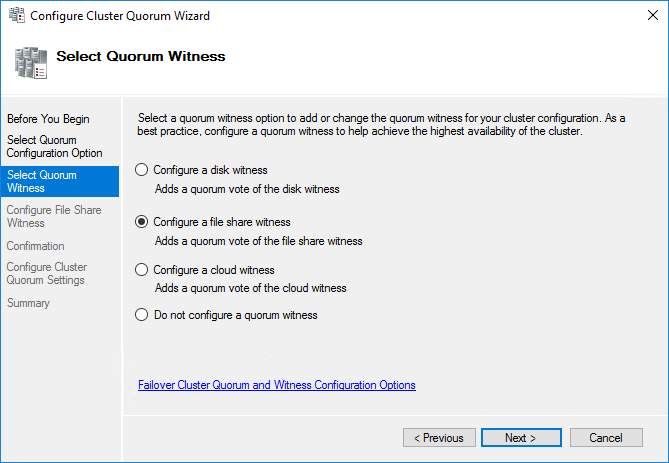
- Choose Configure a file share witness and click Next.
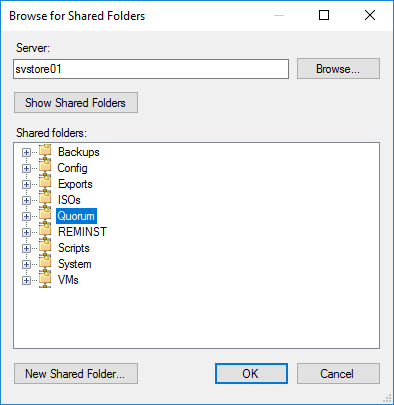
- You can manually enter or browse to the shared location.
- Manual entry:
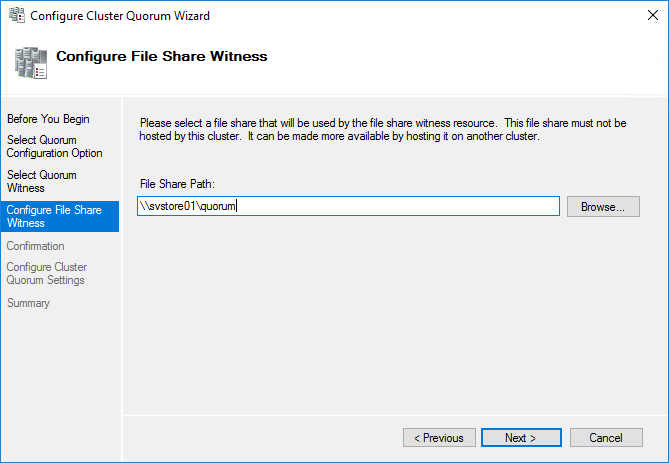
- Browse:
- Manual entry:
- The next screen summarizes your proposed changes. Review them and click Next when ready. The cluster will attempt to establish your setting.
- The final screen shows the results of your action.
Checking/Verifying Your Cluster Quorum Settings in Failover Cluster Manager
The home screen in Failover Cluster Manager shows most of the pertinent information for a file share witness. Look in the Cluster Core Resources section:
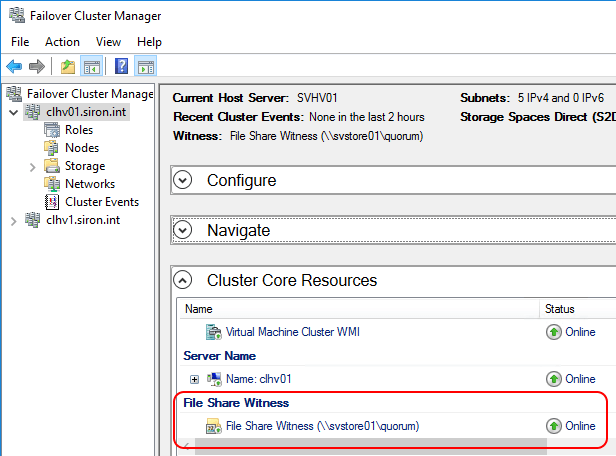
You can see the most important things: the state of the share and where it lives. You cannot see the name of the sub-folder used.
Checking/Verifying Your Cluster Quorum Settings in PowerShell
The built-in PowerShell module does not join the information quite as gracefully. You can quickly see the status and mode with Get-ClusterResource: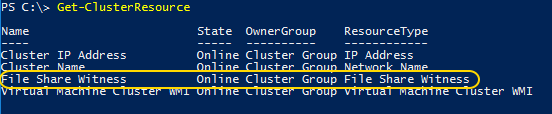
If desired, you can pare it down a bit with Get-ClusterResource -Name ‘File Share Witness’ or just Get-ClusterResource ‘File Share Witness’.
You can see the mode with Get-ClusterQuorum, but it doesn’t show much else.
If you want to see the settings, you’ll need to get into the registry. The pertinent keys:
- HKEY_LOCAL_MACHINEClusterQuorum
- HKEY_LOCAL_MACHINEClusterResources<quorum GUID>
- HKEY_LOCAL_MACHINEClusterResources<quorum GUID>Parameters
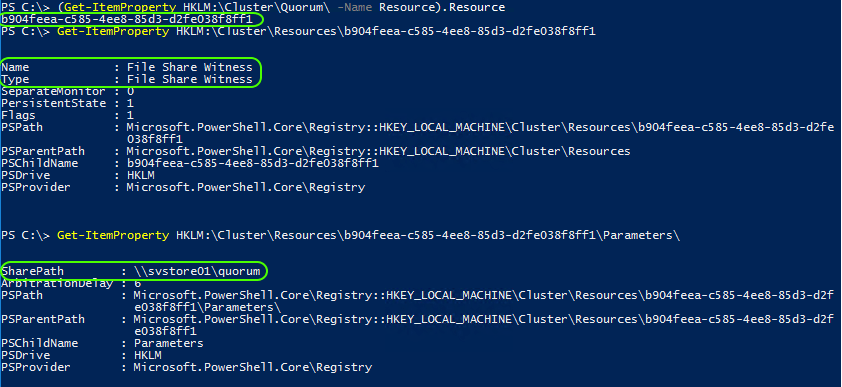
The value for the quorum GUID can be found in the Resource key-value pair under HKEY_LOCAL_MACHINEQuorum. The PowerShell interface for the registry is a bit messy:
(Get-ItemProperty HKLM:ClusterQuorum -Name Resource).Resource
That will output the GUID used in the other registry keys and the subfolder that was created on the file share witness. You can use it to retrieve them:
Troubleshooting a Cluster File Share Witness
There isn’t a lot to the file share witness. If the cluster says that it’s offline, then it can’t reach the share or it doesn’t have the necessary permissions.
I have noticed that the cluster takes longer to recognize that the share has come back online than a cluster disk. You can force it to come back online more quickly by right-clicking it in Failover Cluster Manager (screenshot above) and clicking Bring Online.
Why Use a File Share Witness for a Hyper-V Cluster?
With the how-to out of the way, we can talk about why. For me, it was because of the evolution of the cluster that I use to write these articles. I’ve been running the Microsoft iSCSI Target. But, as my cluster matured, I’ve been moving toward SMB. I don’t have anything left on iSCSI except quorum, Keeping it makes no sense.
To decide for your own option, analyze your options:
- No witness: In a cluster with an odd number of nodes, you can go without a witness. However, with Microsoft Failover Clustering’s Dynamic Quorum technology, you’ll generally want to have a witness. I’m not sure of any good reason to continue using this mode.
- Disk witness: Disk witness requires you to configure a standard Cluster Disk and dedicate it to quorum. Historically, we’ve built a SAN LUN of 512MB. If you have a SAN or other fiber channel/iSCSI target and don’t mind setting aside an entire LUN for quorum, this is a good choice. Really, the only reason to go with a disk witness when you have this option available is if you want to have your quorum be separate from your target.
- Cloud witness (2016+): The cloud witness lets you use a small space on Azure storage as your witness. It’s a cool option, but not everyone has reliable Internet. Since you’ve already got storage for your cluster, cloud quorum might be overkill. But, it’s not a bad thing if you’ve got solid Internet. I would choose this for geographically dispersed clusters but otherwise would probably skip it in favor of a disk or share witness.
Realistically, I think the share witness works great when you’re already relying on SMB storage. As those builds become more common, the file share witness will likely increase in popularity.
Reliability Requirements for a File Share Witness
You want your file share witness to be mostly reliable, but it does not need to be 100%. Do the best that you can, but do not invest an inordinate amount of time and effort trying to ensure that it never fails. If you have a scale-out file server that always is online, that’s best. But, if you just have a single SMB system that hosts your VMs, that will work too. Remember that Dynamic Quorum will work to keep your cluster at a reasonable quorum level even if the file share witness goes offline.
Need any help?
If you’re having any issues setting up and configuring a File Share Witness for a Hyper-V Cluster let me know in the comments below and I’ll help you out. Also, if you’ve got any feedback at all on what’s been written here I’d love to hear it!
More in this category


About the Author

Eric Siron

